Showing posts with label google. Show all posts

Tuesday, September 13, 2011

Google Bookmarks in chrome

If you are like me, using a hell lotta bookmarks and use the ALL POWERFUL Google bookmarks (the same one Google toolbar uses in firefox, ie etc), then you probably hate Google's move to Google docs for chrome's bookmark sync. Sync could be good, but I can't lose my old ones at Google bookmarks.

Now, you want to use the super-chrome's super features :) and toolbar of firefox which sadly is not available with chrome. Here's the solution to all!



To Google bookmark a page in Chrome

To bookmark the current page, I click myBookmarks button. (You can see in the screenshot that I file it under Send to, but you can put it anywhere.) I optionally edit the title and add tags to make it easy to find later, and click Add bookmark.
At this point, my Google bookmark is saved and I can access it later from anywhere.

To return to a Google bookmarked page in Chrome

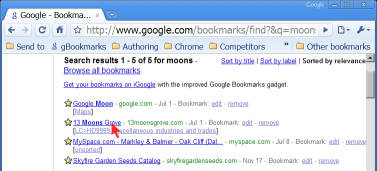
To find a Google bookmark page, I use search, naturally. In the address bar (a.k.a. the omnibox), I type gb (for Google Bookmark), press Tab orSpace, type search word(s) that match the bookmark name or tags, and pressEnter. On the results page, I click the bookmark I wanted.

To add these customizations to Google Chrome

To create the Bookmarks button, drag this bookmarklet to the Google Chrome bookmarks bar: Google Bookmark (or do the same thing from Google’s help page Bookmarks: Using Google Bookmarks, which is where I got it).
You can, of course, add the bookmarklet to a folder, as I did.
To add Google Bookmark search to the Chrome address bar, right-click in the address bar, choose Edit search engines…, click Add, fill out the form as follows, and click OK:
Name:
Google Bookmarks
Keyword:
gb
URL:
http://google.com/bookmarks/find?&q=%s
(In the Search Engines window there is also an option to make this the default search, if you wish.)

Rooting the Nexus!

Rooting:

Rooting is a process that allows users of mobile phones and other devices running the Android operating system to attain privileged control (known as "root access") within Android's Linux subsystem with the goal of overcoming limitations that carriers and manufacturers put on some devices. It is analogous to jailbreaking on devices running the Apple iOS operating system.

That's how Wikipedia defines it! In short, you become the admin user a.k.a God! :) and mess up things the way you love!

I understand that the word Jailbreak sounds more like an illegal activity than 'Rooting' does. And actually their intentions are similar to their phonetics and so are the companies' views on them! Apple wants to prevent Jailbreaking on their devices while Google support rooting theirs! :)

Google is in fact urging it's partners, the hardware manufacturers to impose less restriction on the hardware/software and encouraging them to let the users decide how they want their phones. Although Android is now running more than just phones. For instance Android now runs Barnes & Nobles' e-Reader 'Nook', Sony's new Z-series Music Player, just to mention a few.

On that front, HTC has now officially released instructions along with the required tools, on their websites, to help customers unlock their phones.

The Nexus S comes with an awesome bootloader from Google that makes unlocking and rooting the devices the easiest! Easier than on any other phone.

Rooting the phone requires installation of a super user application on the device. Now the super user tool comes in two pieces - the binary which does the rooting and then the app that lives in the App drawer of the phones that gives and GUI to manage grant and revocation of SU rights to any other app as and when required.

The following is the breakup of the steps and each step is explained in detail in separate posts. This is to enable you to understand what you're upto and hence not again read the lines "Don't do this if you don't know what you're doing"!!!
  1. Unlock the bootloader
  2. Install custom Recovery
  3. Install the super user binary (& app).

1. Unlocking the Bootloader

The bootloader of the Nexus S is locked initially. You'll have to unlock it using a tool called fastboot. Warning: Since unlocking the bootloader and rooting the phones gives access to all the private data, by circumventing the Android's security model based on Unix, all your phone's data and data on the internal SD card will be erased for security reasons. Hence take a backup of the important data into your computer before you proceed.


You should have Android SDK installed in your machine. For this tutorial, I use a mac. Post Android SDK installation, download and place fastboot (which is just a single binary file) in your path or if you're comfortable, run it from any directory, using a terminal.

I would prefer you to place fastboot in the 'tools' directory of your android SDK installation.

Step 1. Reboot your phone into the bootloader by shutting it down and then turning it on by holding the volume up button + power button and you should see this.

Step 2. When on the bootloader screen, connect your phone to PC/Mac and run the command

fastboot devices
which should give an output similar to

List of devices attached 
HTXXXXXXXXXX	device


Step 3. Once, it's confirmed that your device is recognizable by fastboot, run the following command to unlock the bootloader. 

fastboot oem unlock
 
Read the warning on the phone and accept it.  That's it! Now you have an unlocked phone or bootloader, perhaps! :D This can be confirmed by seeing noting the last line on the first paragraph of the bootloader screen that reads

LOCK STATE - UNLOCKED

Next you shall run  

fastboot reboot
reboot your phone. Another hint to know that your bootloader is unlocked is to reboot your phone into the os and you can notice that beneath the Google logo appearing while it boots, there should appear an unlocked-lock icon!

It should be no surprise that you can run

fastboot oem lock
to lock the bootloader if you wish!